Looking to DIY an easy winter scarf this season? Well, look no further! This Easy Winter Scarf Tutorial is simple to make, looks expensive and will make the best gift idea this winter!
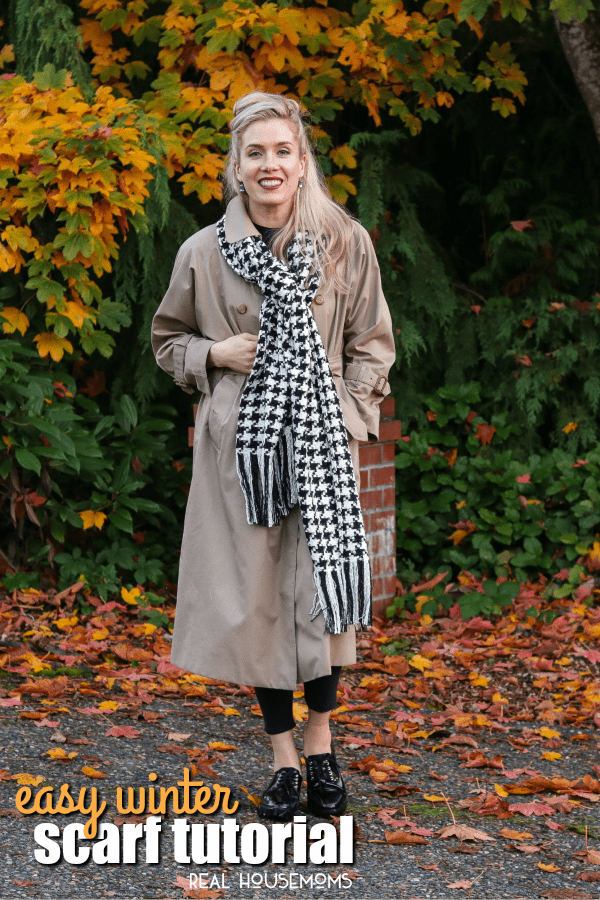
As I was flipping through one of my favorite fashion magazines, I came across the most amazing woven scarf that I instantly wanted to share with all of you! For my sewing novice friends, there is some light sewing involved but if you can sew a straight line, know someone who can sew a straight line, or are feeling determined to learn to sew a straight line, then you can make this easy winter scarf in a flash!
EASY WINTER SCARF TUTORIAL
Like this recipe? Pin it to your STYLE pinboard!
Follow Real Housemoms on Pinterest
Plus, it will fool everyone into thinking that you slaved away at home making the coolest winter scarf this season – you are so crafty! Inspired by the latest Rag and Bone collection, this tutorial will even impress your bank account – by the several zeros you will save by making your own – say what, you are fashion forward and thrifty, too?! AND, heck yes it gets even better, you will have enough to make a few extra with your leftover fabric – can we say gift idea?!? Look at you, miss thoughtful! (You’re welcome in advance.)
With that said, to recreate this Easy Winter Scarf Tutorial, you will need:
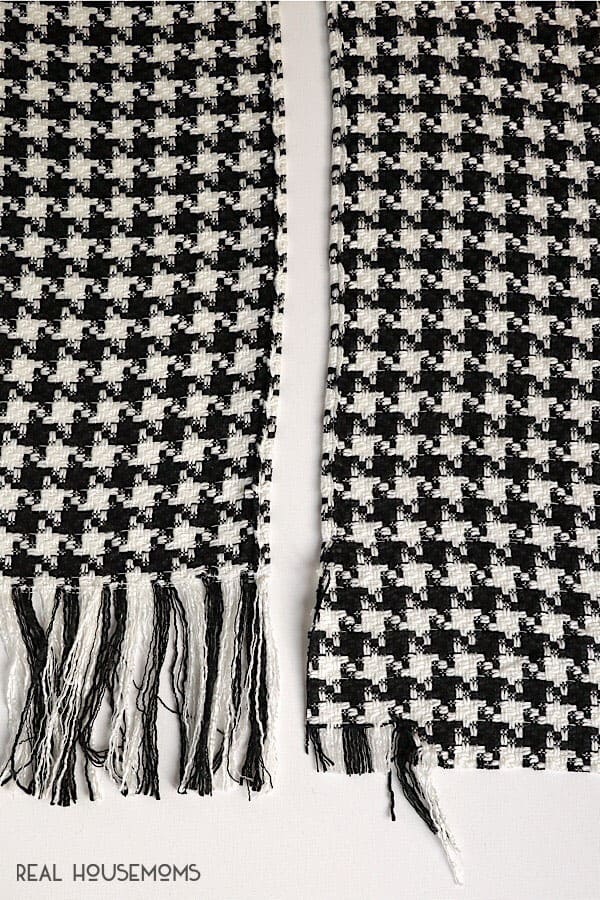
- 102″ of Tweed Fabric. A loose and chunky tweed is a perfect choice. I bought this black and white houndstooth from Joann Fabrics years ago, but you can find it some gorgeous tweeds at this Etsy shop or whatever you find at your nearest fabric store.
- Sewing supplies: matching thread, needle or sewing machine.
Directions:
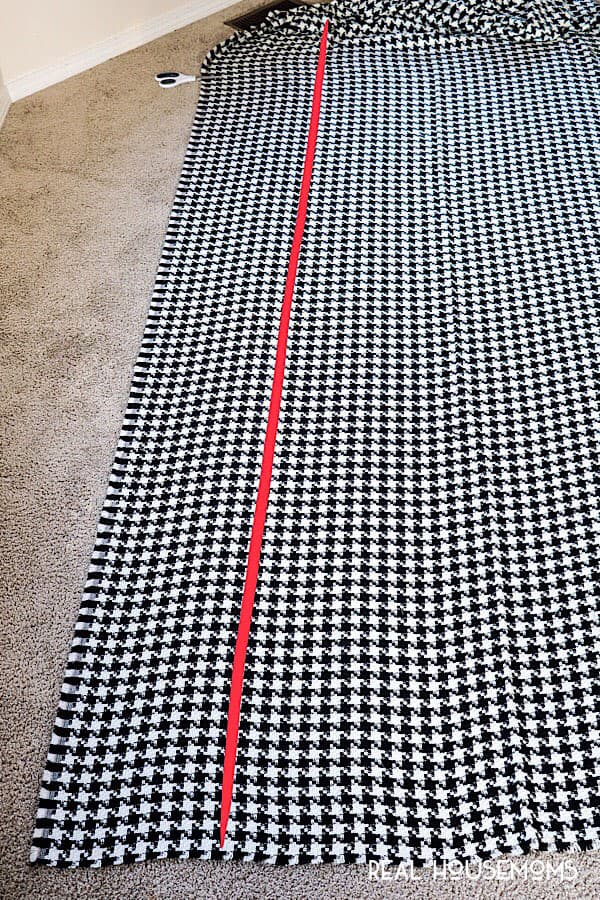
- Lay out your fabric and measure our your scarf. I used the plaid as a guide for cutting. You can choose the desired dimensions of your scarf. Mine was about 102″ in length by 20″ in width.
- Once you cut your fabric, there will be a selvage edge that needs to be trimmed – it’s the long edging of your fabric.
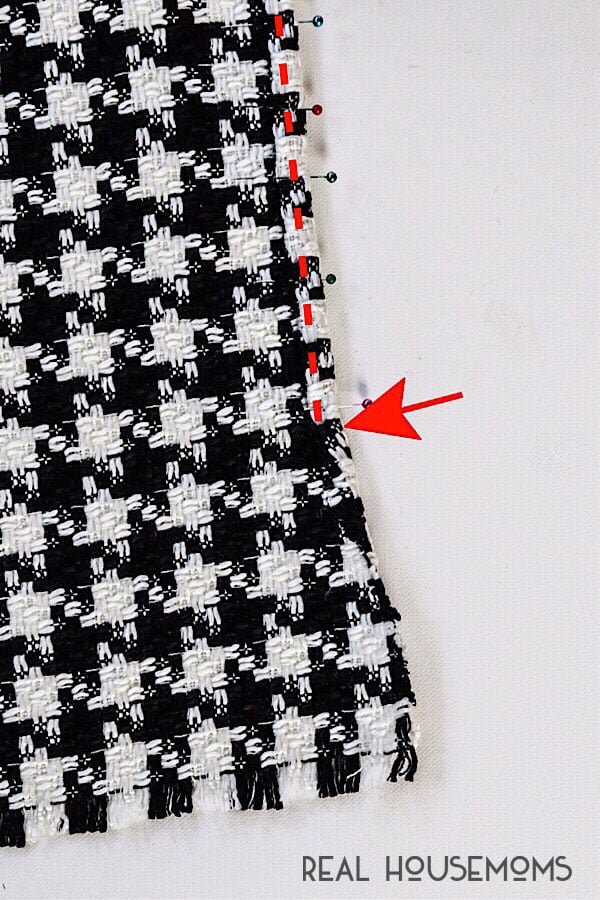
- Next, turn/fold/roll your edges over twice, so the fray is hidden, pin in place, and sew the length of your scarf. I left the last 5 inches of each end alone so that I could easily fray the ends of my scarf.
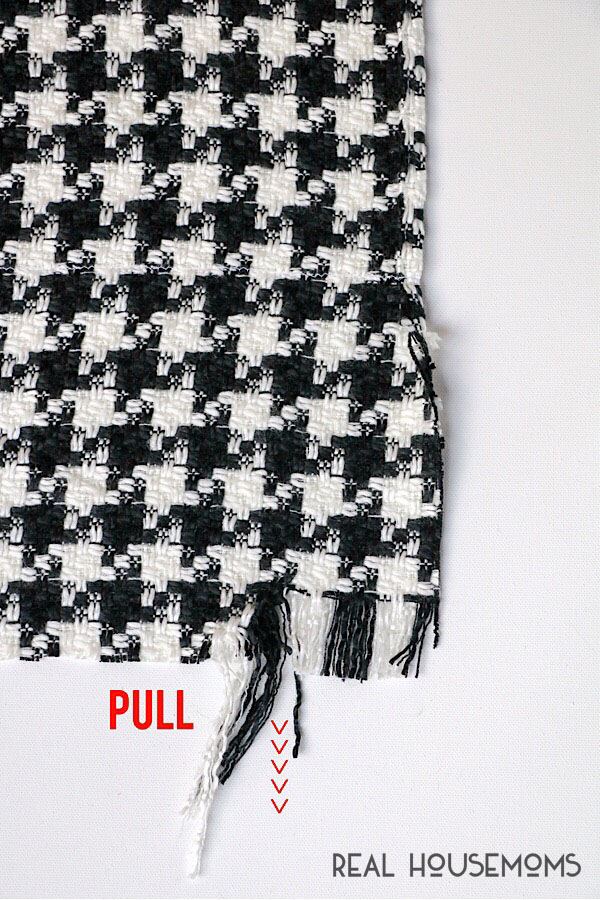
- Once the sides are securely sewn to prevent fraying, start to pull the short ends of your woven fabric.
- When done with one side, complete the other end of your scarf. If you want to secure your fabric to prevent further fraying, you can zig-zag along the last thread of your scarf.
- Complete the other side and you are done!
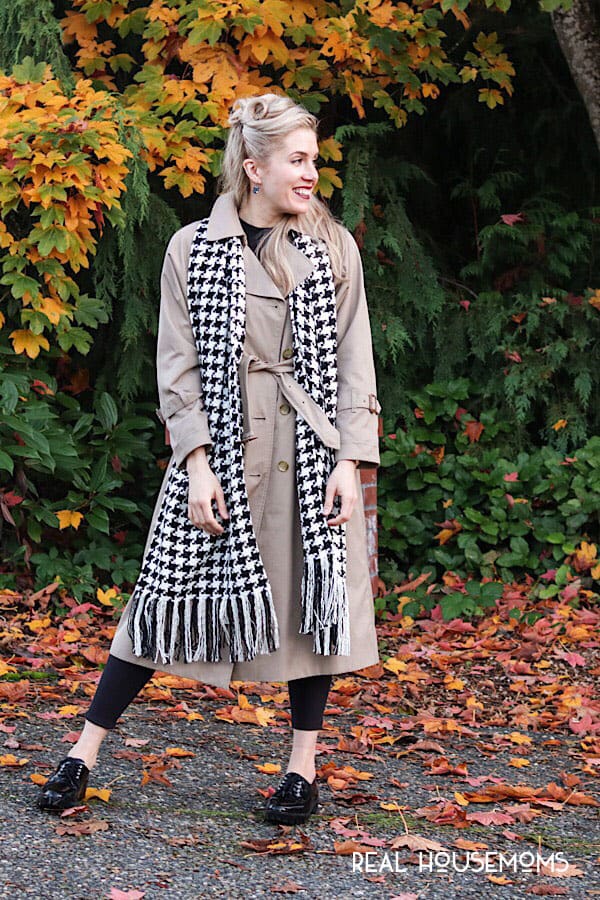
Your scarf should look very similar to the one I a wearing in the picture below!
What if you cannot find a fabric you love? Never fear, you can even visit your nearest Target or Pottery barn and grab one of their gorgeous fringed throws and STILL make it work! The best part about going that route is that you can ditch one extra step by creating a fringe! The con, it won’t be as long but trust me – it will be just FINE and even more expensive looking!
It’s one of my favorite new scarf ideas and I cannot wait to make MORE. I hope you love this Easy Winter Scarf tutorial as much as I do! If you need more scarf ideas, check out my easy blanket scarf tutorial – I still wear this one all the time!
Thanks so much for stopping by and have a glamorous day!




Leave a Reply