• Home
  • About
  • Contact
    • Privacy Tools
  • RH Team
    • Join Our Team
  • Meal Plan
↑

Real Housemoms

Easy Recipes for Busy Families

  • Recipes
  • Round Ups
  • DIY & More
    • Crafts
    • DIY
    • Printables
  • Lifestyle
    • Cleaning & Organization
    • Mommy & Me
    • Beauty & Fashion
    • Health & Fitness
  • Holidays

Real Newsletter

Subscribe for recipes, tips and tricks & more!

There was an error submitting your subscription. Please try again.

Home » DIY Christmas Tree Baby Headband

DIY Christmas Tree Baby Headband

By Abbey DeHart · Published: November 28, 2015 · Last Updated: November 25, 2015

  • Facebook
  • Pinterest
  • Twitter
  • Yummly
  • Mix
  • Email
This post may contain affiliate links. Read my disclosure policy.

Can you believe that Christmas is less than a month away?! I love this time of the year and one of our traditions is getting the kids dressed up to go see Santa. Now that I have a daughter, it’s even more fun to hunt down adorable little outfits for her to wear for the holidays, but MAN they can be expensive! Especially accessories!

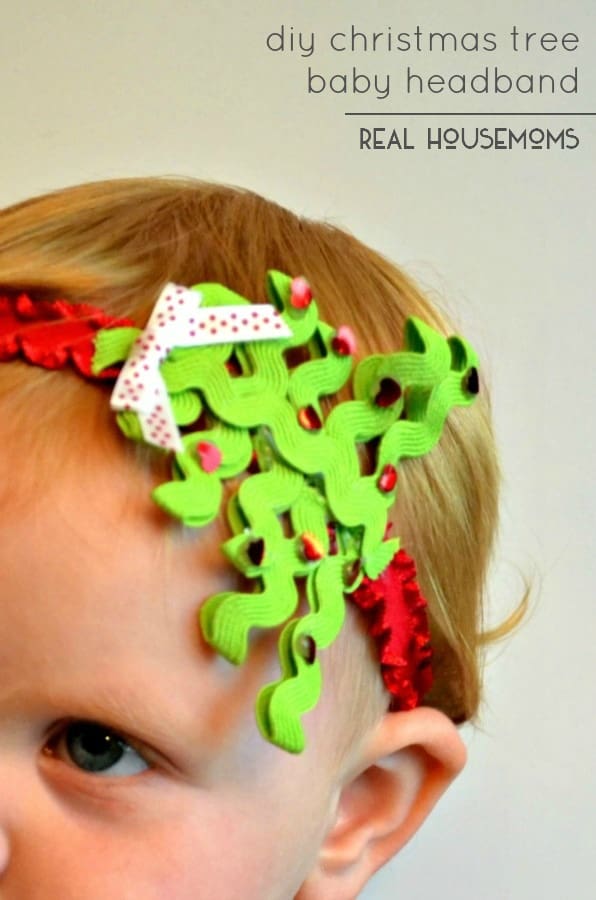
Let’s be honest, how many times are they going to wear that holiday headband you buy off Etsy for say, $15? So today I’m showing you how I made this cute DIY CHRISTMAS TREE BABY HEADBAND for my daughter in a matter of minutes! All the supplies cost about $7 and I could make at least two of them for that amount. Check it out….
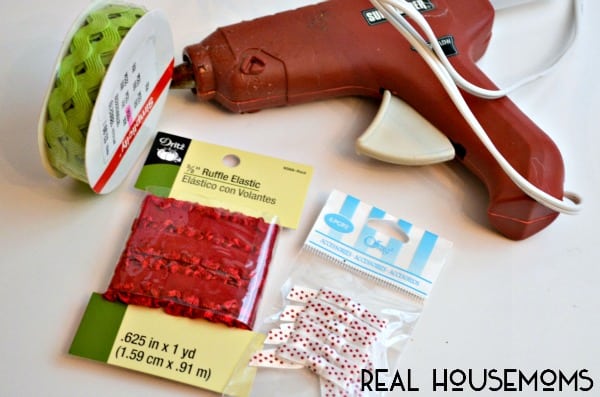
Get your little girl ready for her picture with Santa with this DIY CHRISTMAS TREE BABY HEADBAND tutorial!

Real Housemoms TV

Supplies:

Red decorative elastic

Green medium width ric rac

Scissors

Hot Glue

Small bow

Small decorations as desired

Get your little girl ready for her picture with Santa with this DIY CHRISTMAS TREE BABY HEADBAND tutorial!

How to:

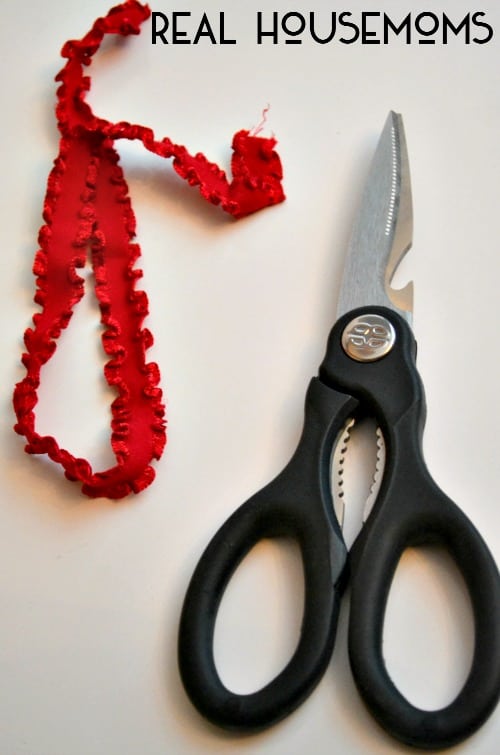
Start by measuring your child’s head and deducting about an inch to 1.5″ from the length. Test your elastic around their head to make sure that your measurement grabs on their head and doesn’t fall off too easily, but also isn’t too tight. Then cut.

Get your little girl ready for her picture with Santa with this DIY CHRISTMAS TREE BABY HEADBAND tutorial!

After that, start cutting your pieces of ric rac. I cut my ric rack according to the number of “U’s” in the material. So I started with 3 U’s and folded it over to give each one a little more dimension and sturdiness. You’ll need two pieces of each to coordinate on each side. The largest piece will be at the bottom and the smallest at the top. In the middle I cut two of the pieces the same length so that it built up my “tree” a bit more.

Get your little girl ready for her picture with Santa with this DIY CHRISTMAS TREE BABY HEADBAND tutorial!

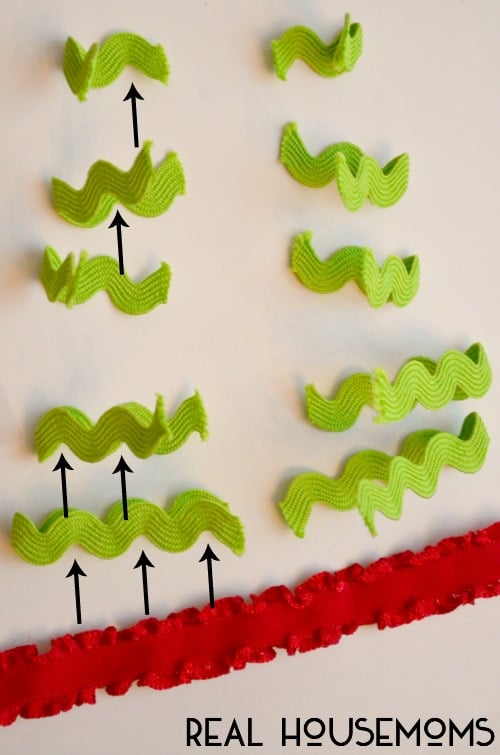
You’ll see that each piece was folded in half and cut at the top of the “U” in the ribbon. I hope that makes sense. You’ll essentially have 5 layers of ribbon. The bottom one has three “U’s” in the material. The second and third lines from the bottom have 2 “U’s”. The fourth line has 1 “U” and the top line, the fifth, has a half. See below for a better photo.

Get your little girl ready for her picture with Santa with this DIY CHRISTMAS TREE BABY HEADBAND tutorial!

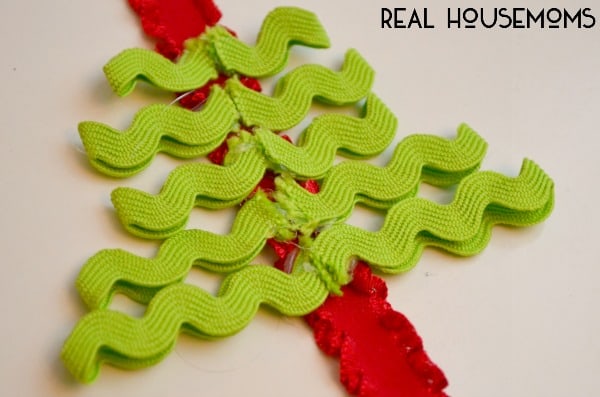
Once they’re all cut, I folded them in half and hot glued the ends together, then hot glued the whole thing onto my elastic ribbon.

Get your little girl ready for her picture with Santa with this DIY CHRISTMAS TREE BABY HEADBAND tutorial!

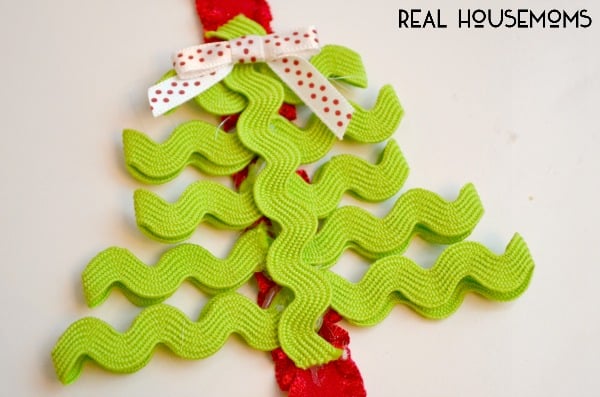
Then I took a long piece and hot glued it up the center of my tree to give it a more finished look and add the top of the tree. Finally, I hot glued a little bow for my topper and then glued some little red hearts I had on hand as decorations.

Get your little girl ready for her picture with Santa with this DIY CHRISTMAS TREE BABY HEADBAND tutorial!

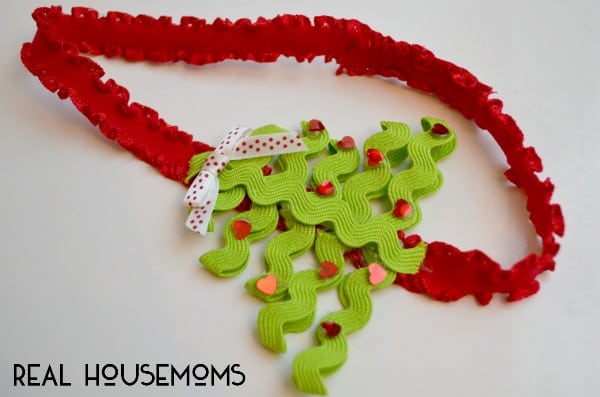
After I was done, I hot glued the ends of the headband together and VOILA! I have a cute little headband for my babe!

Get your little girl ready for her picture with Santa with this DIY CHRISTMAS TREE BABY HEADBAND tutorial!

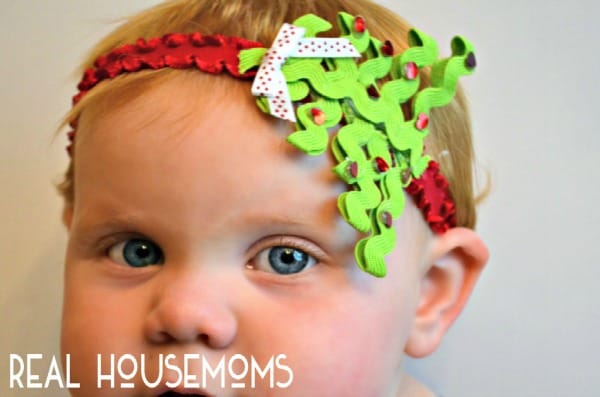
The project takes about 15 minutes to make and my daughter loved it 🙂

Hope you have a great and stress free holiday season!! Come find me at The Cards We Drew.


Image Map


Download your FREE copy of Dinner Made Easy!

Sign up to receive our newsletter and download your copy of Dinner Made Easy FREE! You'll get one email a week with our favorite recipes and tools to make life easy!

Thank you so much for signing up to get our recipes delivered right to your inbox! Check your inbox to get our thank you present and to confirm you really want to sign up! You can unsubscribe at any time but I really hope you stick around!

There was an error submitting your subscription. Please try again.

Powered by ConvertKit
  • Facebook
  • Pinterest
  • Twitter
  • Yummly
  • Mix
  • Email

This post may contain affiliate links. Read my disclosure policy.

Abbey DeHart

I'm a working wife and mommy residing in Columbus, OH. By day I work in accounting and by night I'm a blogging, crafting fanatic. My blog has slowly developed into a creative outlet over the years.

Leave a Reply Cancel reply

Your email address will not be published. Required fields are marked *

Recipe Rounds Ups

Popular Recipes


Weekly Meal Plan

Real Newsletter

Subscribe for recipes, tips and tricks & more!

There was an error submitting your subscription. Please try again.

Copyright ©2019, Real Housemoms. All Rights Reserved.
Design by Pixel Me Designs