I have a slight addiction to fabric. I. LOVE. IT. And I probably buy too much of it (just ask my husband). A lot of times I find myself buying some fabric and then racking my brain for a project to use it in. You know … because I need more projects (sooooo joking on that last statement). This fall … I really wanted to go with a neutral color scheme around our home. White, black, wood, and grey … with a focus on the black and white. About a month ago, I bought this fun black and white striped fabric that I wanted to incorporate into the decor somewhere. It is a very thin stripe, and as I envisioned our dining room, I decided that it would be perfect on the table! But not as a table cloth … that might be way too overwhelming, but as napkins! An while I’ve never actually made napkins before, I set off to figure it out. Turns out … It’s really pretty easy, and by the 4th one you’ll be a pro and able to churn ’em out in lightning speed. Okay … lightening speed might have been a slight exaggeration, but once you do a couple it’s amazing how quick they go!
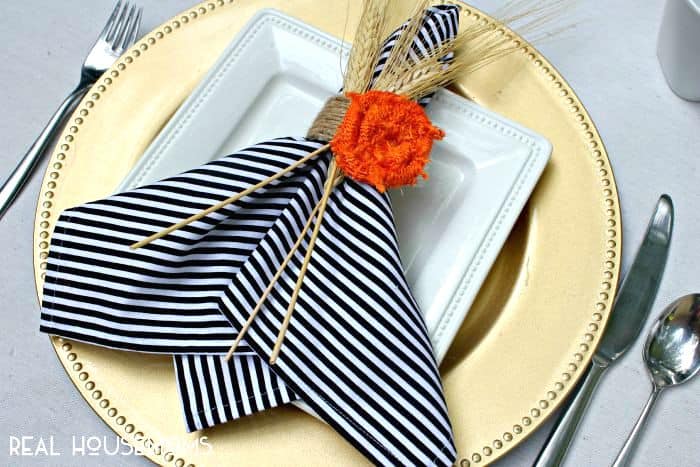
Here’s how they turned out:
Fun for fall, huh? With a napkin ring of twine wrapped around a toilet paper roll (yeah … I might not mention what it’s made out of to our guests), an orange burlap rosette, and a couple of faux wheat stalks … this place setting is festive, modern, and SIMPLE! And I got to use that striped fabric!
If you also are in need of some napkins for your fall dining … OR if you have some awesome fabric lying around just begging for a project, here’s how it’s done …
SUPPLIES
- Fabric cut in 18″ x 18″ squares for however many napkins you plan on making.
- An iron.
- A sewing machine and thread.
- Scissors
PROCESS
Making a fabric napkin is simple. Basically, you cut a square. The problem comes, however, when you start trying to neatly hide those rough edges. The tricky part (and what this whole tutorial is about), is getting those perfectly ‘mitered’ corners. Other than that, as long as you can sew and iron … this project is a piece of cake.
So … let’s talk mitered corners and how exactly to make neat ones:
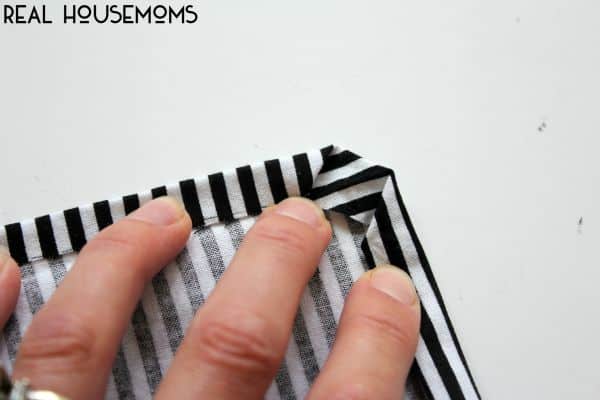
Step 1: With your fabric cut into a square, you’ll first need to create two creases along all edges of your fabric. These will act as the hem (to hide the rough edges), but in each corner, these two creases will also be your guides for cutting and folding when making those mitered corners. Fold all four edges over roughly 3/8″ and press. Then fold them all over another 3/8″ and press again. Your square should now look similar to this at each corner:
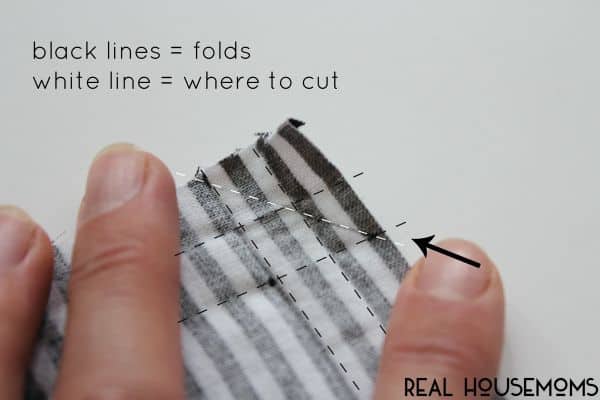
Step 2: Next, starting at one corner, unfold the edges you just pressed (those are marked with the black dashed lines below and going forward). You first need to snip a little off the corner. With my scissors, I simply snipped diagonally from where the inside crease hits each edge. That’s way easier to show with the white dashed line in the picture below than to explain. This doesn’t need to be dead-on, but it should be relatively close.
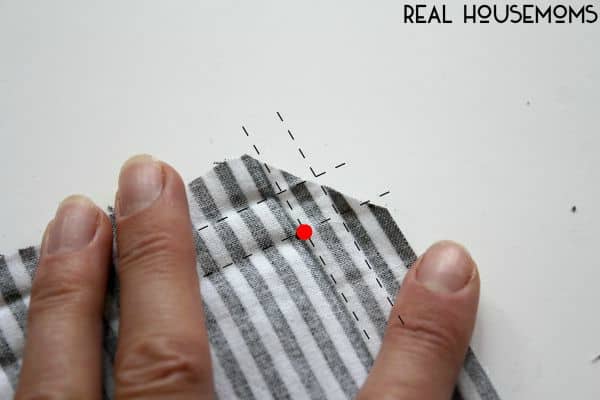
And after the cut:
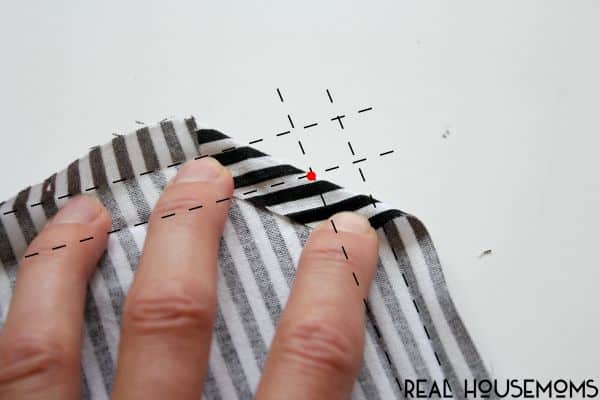
Step 3: Make your first fold parallel to that cut you just made. Again, this is easier to show you (in the picture below) than to explain, but basically you want to note the intersection of the two inside creases (red dot in picture above and below). You want your new crease to be through that dot:
You can stop and press this fold now, or wait to press the entire corner once the next folds have been made (my preferred method is the ladder … partly because I’m lazy efficient).
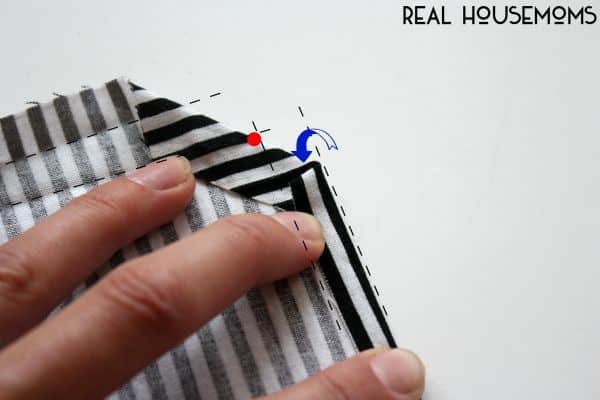
Step 4: Fold one side along the first crease you ironed (again … take a look at the right side in the picture below to understand better).
Step 5: Fold that same edge over again along the second crease you ironed:
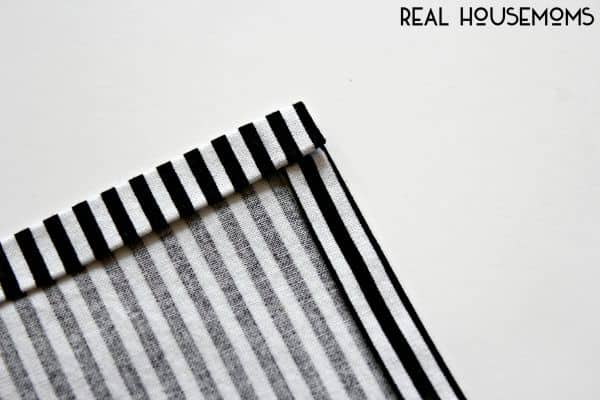
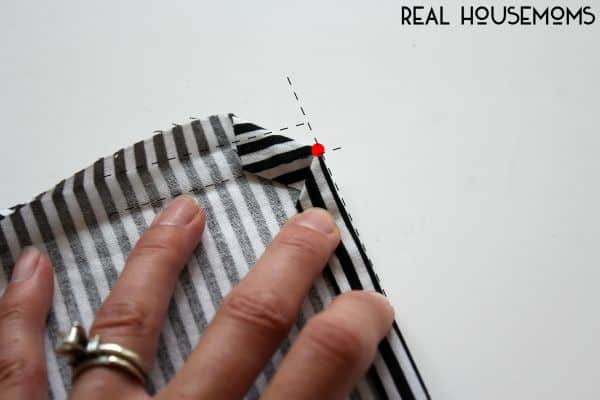
Step 6: Repeat those last two steps (last two folds) for the other edge (in this case the top edge):
First fold along the top edge
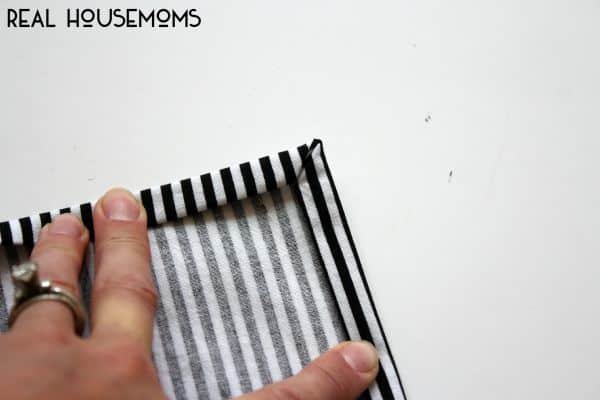
And with your second fold, the corner should nicely come together as shown below:
It felt like magic the first time those corners neatly matched up (I get excited about small things … apparently).
Press this neat corner and move on to the next … and the two after that!
Once all corners are folded and pressed, simply sew along each edge of your napkin close to the inside folded edge (so roughly 1/4″ in from the outside edge).
Custom fabric napkins to fit just the look you’re going for!
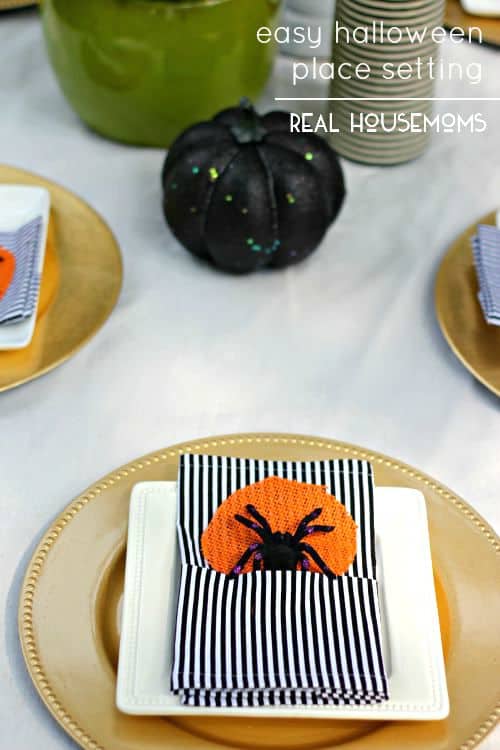
If you want to get fancy, you could fold the napkins and tuck in a ‘surprise’ for a Halloween party:
It’s the small things that make your table special, right?!? (Don’t ask my husband this question, however, as I’m pretty sure he doesn’t care about our new striped napkins).
Happy Fall decorating, and if you get a chance, I’d love for you to stop by View From The Fridge and say hello!



Mariette Forget says
Hi and thank you very much! I love stripes so I am sure I will make similar napkins. Have a great day! 🙂
Aubrey Cota says
Aren’t they so cute, so versatile for any season! Thank you.