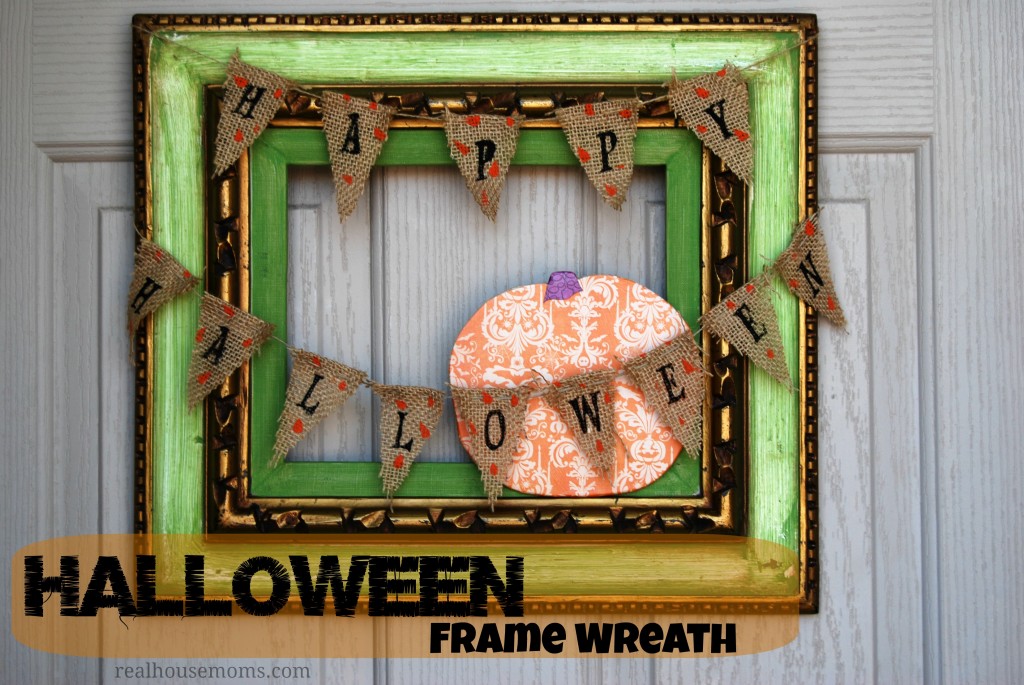
I love decorating for the holidays! Halloween is a lot of fun with the start of all the pumpkin food and drinks, candy, dressing my kids in fun costumes, candy, the start of all the cool weather and did I say candy? I may have a problem that is unleashed this time of year but this post is not about that. This post is about this adorable, easy, fun Halloween wreath. This wreath is really just a jumping off point. You can take this idea and go crazy with it, make it your own, or get as close to it as you can, it’s up to you.
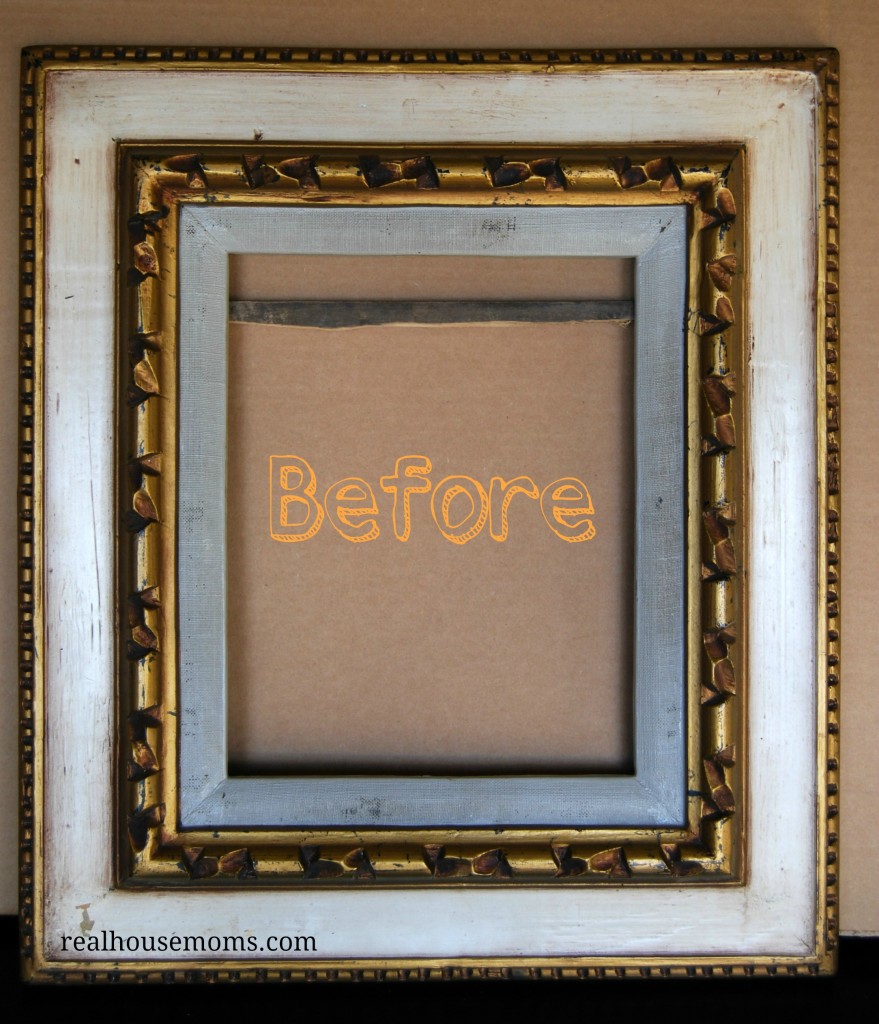
It all started when I had to make a drop off at Goodwill. Of course I couldn’t just drop off, I had to go inside and see what everyone else had dropped off. So, I found this very cool looking frame and thought it would be perfect for a Halloween wreath. I loved that it was roughed up and had this great gold detail. It just screamed Halloween. So I brought it home and went to town. Here’s what I used:
- Old frame
- green, black & orange craft paint
- sponge paint brush
- painters tape
- burlap
- twine
- super glue
- Halloween scrapbook paper
- Mod Podge
- plywood and jig saw or wood pumpkin from craft store
- lettering (stencil or printed and created)
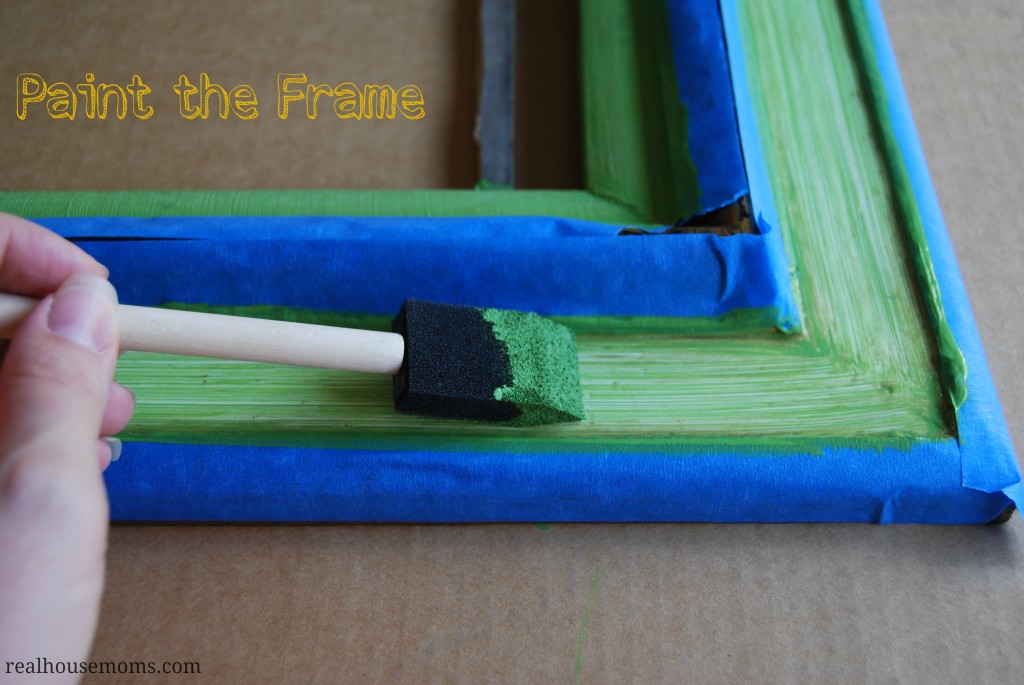
The first step is to tape off anything you don’t want painted. In this case I wanted to keep the gold detail so it was all taped off. Then, I painted the rest of the frame with the green craft paint. I only did one coat because I wanted it to look rough and streaky to go along with the Halloween look. While your frame is drying work on your bunting.
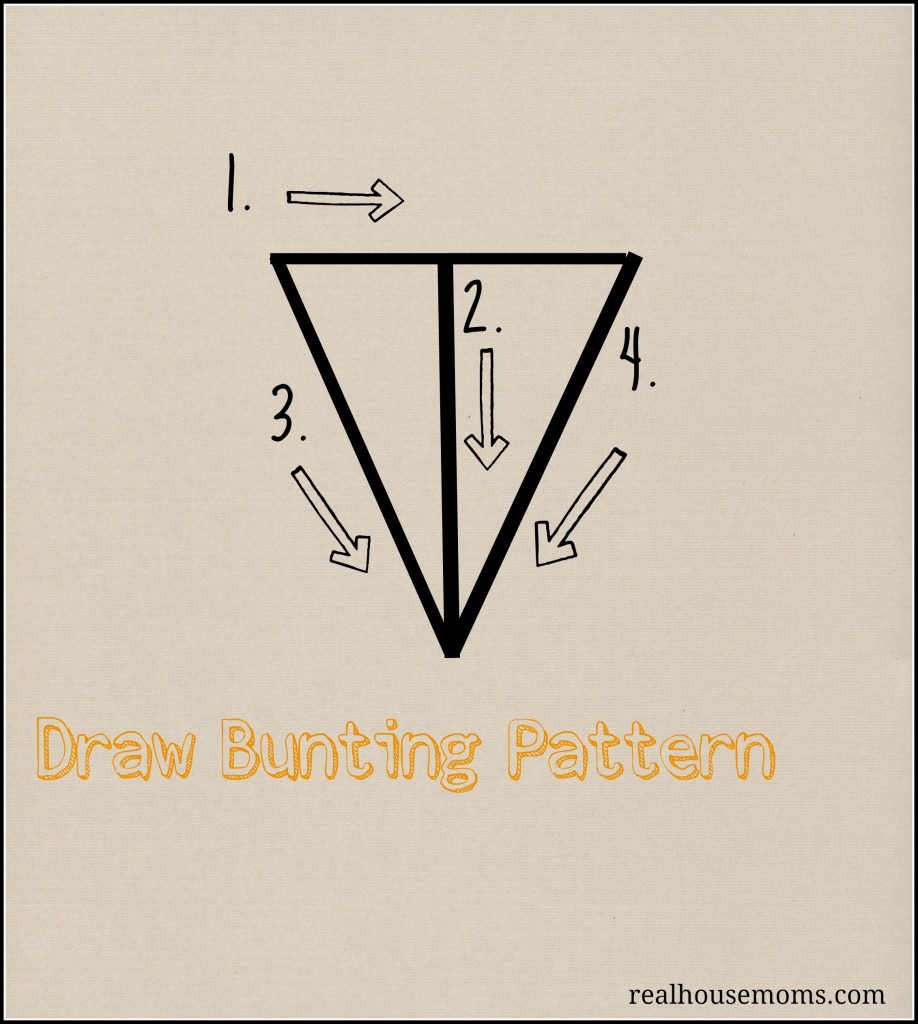
I made my bunting small to fit the frame. I made a paper pattern to get an idea and make it easier to cut out uniform pieces. I made the short side of my triangle (the side attached to the twine) 2.” From the center of my 2″ line I drew a 3″ line down. I then connected the two ends of my short line to the bottom of my long line to make a triangle. See below image to understand that gibberish. I then cut out 14 triangles that would later become my beautiful Halloween bunting.
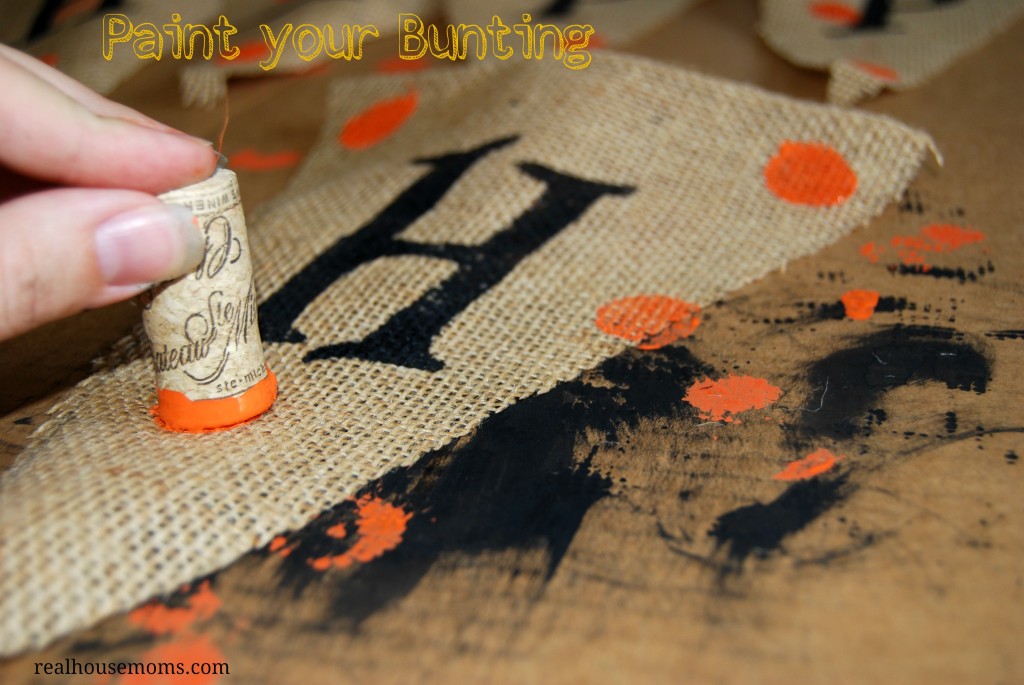
The next step is to paint the lettering onto your burlap. I don’t have a fancy stencil maker so I had to resort to a trick I saw on Pintrest (and didn’t pin so I can’t give credit here, sorry). I printed out the letters I was going to need in the size I wanted them, 1″, and then cut them into individual rectangles leaving about 1/2″ around each letter. Next, I covered the back of each letter with painters tape and then used an xacto knife to cut out each letter and voila, stencils! I then used my black craft paint and sponge brush to stencil the letters onto my burlap. Once this was complete I used the corner of my sponge brush to make little orange dots. The only picture I had of this was for a much larger version I made for over my t.v. so I’m using a wine cork but you get the idea, right?
While your letters are drying start on your pumpkin. I couldn’t find a wooden cutout of a pumpkin at Joann’s so I made one myself using my plywood and a jig saw. I just drew the picture on the wood and carefully followed my line with the jig saw. If you can find a cutout you like at your craft store you may want to do this instead. I then sanded the edges and traced my pattern onto my Halloween scrapbook paper. I cut the pumpkin out of the paper and mod podged the paper to my wood following the directions on the bottle.
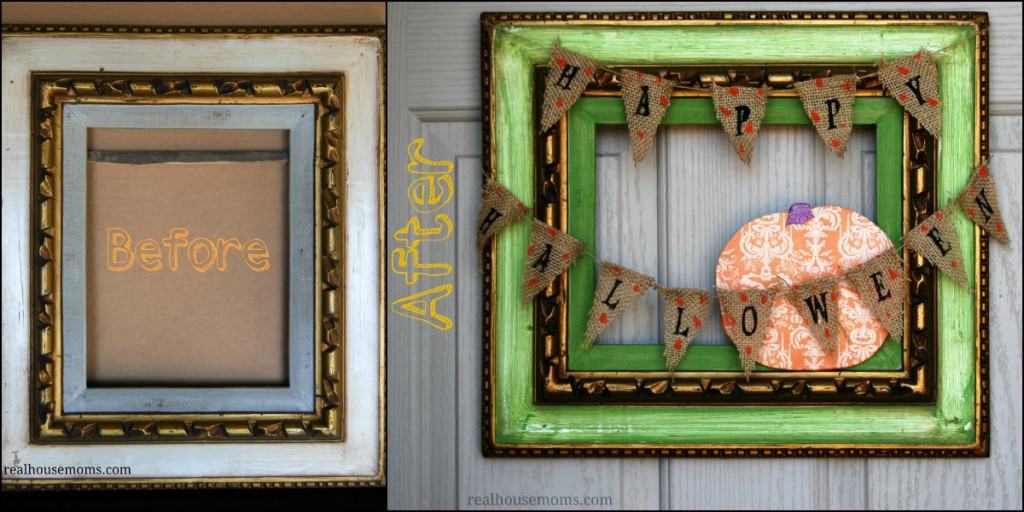
While this dried I threaded a needle with twine and sewed my bunting together. I applied this to the frame using hot glue. I first did a dab on the back of the frame, pushed my twine into the dab then applied more hot glue onto that. I tried to glue the pumpkin onto the frame using hot glue but it fell pretty quickly so I switched to super glue. The last step is to hang and enjoy the admiration of your family for the lovely wreath you have made for your house. 🙂 Below is the before and after. Let me know what you think and how you made it your own. I love hearing from you. If you have any questions just leave a comment or email us at contact_us@realhousemoms.com


Leave a Reply